Geo Data Logger: Arduino+GPS+SD+Accelerometer to log, time-stamp, and geo-tag sensor data
Created: Nov
18, 2012

UPDATES
- Feb 6, 2013: Featured on GeoAwesomeness http://geoawesomeness.com/?p=3388
- Nov 24, 2012: Featured on Hackaday http://goo.gl/XX9oy
- Nov 21, 2012: Featured by John Boxall @ Freetronics http://goo.gl/OvnNC
- Nov 20, 2012: Featured on Dangerous Prototypes http://goo.gl/ve6Eu
INTRODUCTION
I thought it would be educational to build a prototype that I can take on the road to log, geo-tag, and time-stamp sensor data to be analyzed later with mapping and/or data analysis applications. So I figured why not start with a gadget that can log road conditions. This prototype, the Bump-O-Meter, measures road conditions by using an Arduino, a GPS receiver, an SD card, and an accelerometer sensor.This prototype is a generic sensor logging/geo-tagging gadget which means the accelerometer can be replaced with any other sensor(s) to log and map anything anywhere.
As a matter of fact, my next adventure with this logger is to replace the accelerometer with a pollution sensor to visualize levels of air quality around town.
PROJECT OVERVIEW
The Bump-O-Meter uses an Arduino to capture the X,Y,Z motion data generated by the ADXL335 accelerometer. In this case, we are measuring road "shakiness" as a result of road condition. Poor road conditions and uneven road surfaces generate lots of sudden acceleration in the car body up and down (z-axis). But before this data is saved to the SD card, it's tagged with location information from the LS20031 GPS receiver and also date/time stamped in real-time using the GPS satellites' atomic clock. More on this later.
We want to capture and analyze the z-axis acceleration information visually to determine which road stretches are poorer and need attention. We can repeat this and compare our data over time. The possibilities are endless. Not just for road condition scanning, but for any sort of environmental geo-data logging.
HARDWARE COMPONENTS
- Arduino Uno or Leonardo: $25
- LS20031 GPS receiver: $50
- ADXL335 or ADXL345 Accelerometer (or any other sensor): $7
- SN74AHC125 as level shifter from 5V to 3.3V: $1
- SD reader socket. The LC STUDIO: $2.50
- SD memory card. $5 for 4GB.
- LED: $0.1
- Resistor 1K Ohm: $0.1
- Breadboard: $5
- Jumper wires: $2
- Male headers 2.45mm (0.1") - straight and right angle: $1
- Any battery or power source that can provide 7-12V and a minimum of 500mA.
- Arduino IDE 1.02
- MiniGPS 1.4: This is a nifty utility to configure the LS20031 GPS receiver.
- GPSvisualizer.com: This amazing website will help us plot logged sensor data along with the GPS coordinates using color schemes to indicate road conditions.
- MS Excel or comparable spreadsheet: We will use a spreadsheet to scrub the logged data, to remove any garbage, to make sub-selections of our logged, and to format it in a manner that can be read by other applications and websites such as GPSvisualizer.com and Google Earth.
- SD Arduino library (bundled with Arduino IDE)
* I have not tried this prototype with the Arduino Leonardo because of some known issues
with the SD library. But according to the release notes of the Arduino IDE 1.02 software
these issues have been addressed.
** In the future, I am phasing out the SN74AHC125 level-shifter (5V to 3.3V converter) in favor of the CD4050BE HEX Non-Inverting Buffer/Converter simply because it's more readily and cheaply available on eBay.com.
** In the future, I am phasing out the SN74AHC125 level-shifter (5V to 3.3V converter) in favor of the CD4050BE HEX Non-Inverting Buffer/Converter simply because it's more readily and cheaply available on eBay.com.
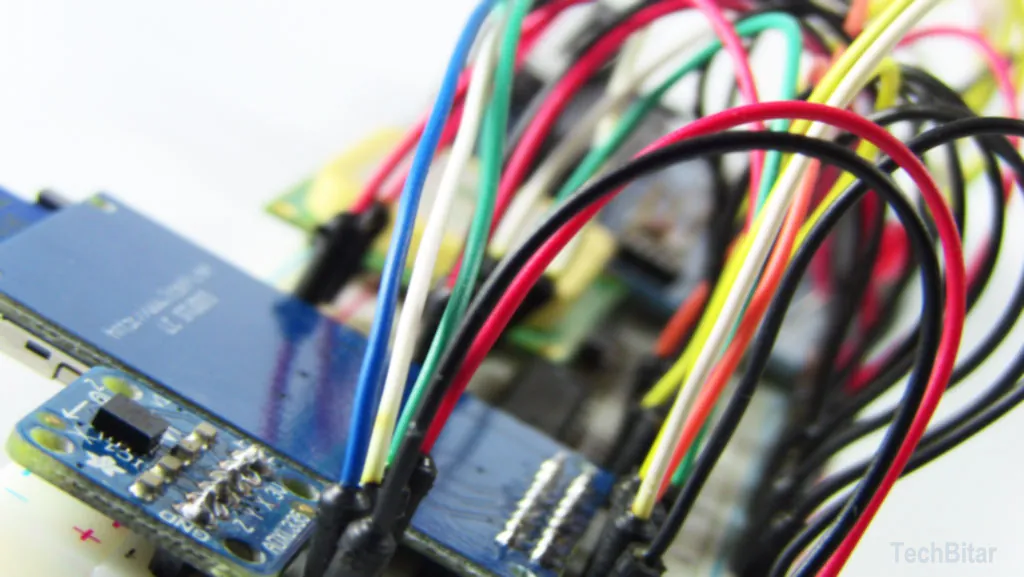
WIRING THE GEO-LOGGER


WIRING THE ARDUINO
- GND -> GND rail of the breadboard
- 5V -> To 5V VIN of the SD card
- 3.3V -> To the positive rail of the breadboard
- PIN13 -> PIN5 (2A) of the SN74AHC125 IC
- PIN12 -> SD MISO PIN
- PIN11 -> PIN2 (1A) of the SN74AHC125 IC
- PIN8 -> LED POSITIVE
- PIN4 -> PIN12 (4A) of the SN74AHC125 IC
- PIN1(TX) -> PIN9 (3A) of the SN74AHC125 IC
- PIN0(RX) -> PIN TX of the LS20031 GPS Receiver
- ANALOG0 -> PIN X of the ADXL335
- ANALOG1 -> PIN Y of the ADXL335
- ANALOG2 -> PIN Z of the ADXL335
- PIN1 (10E) -> GND rail
- PIN2 (1A) -> Arduino PIN11
- PIN3 (1Y) -> SD MOSI PIN
- PIN4 (20E) -> GND rail
- PIN5 (2A) -> Arduino PIN13
- PIN6 (2Y) -> SD SCK PIN
- PIN7 GND -> GND rail
- PIN9 (3A) -> Arduino TX PIN1
- PIN8 (3Y) -> GPS RX PIN
- PIN10 (30E) -> GND rail
- PIN12 (4A) -> Arduino PIN4
- PIN11 (4Y) -> SD CS PIN
- PIN13 (40E) -> GND rail
- PIN14 (VCC) -> Arduino 3.3V pin
- GND -> GND rail of breadboard
- 3.3V -> No connection
- 5V -> Arduino 5V pin
- CS -> PIN11 (4Y) of the SN74AHC125 IC
- MOSI -> PIN3 (1Y) of the SN74AHC125 IC
- SCK -> PIN6 (2Y) of the SN74AHC125 IC
- MISO -> Arduino PIN12
- GND -> GND rail of breadboard
- GND -> GND rail
- TX -> Arduino PIN0 (RX)
- RX -> PIN8 (3Y) of the SN74AHC125 IC
- VCC -> 3.3V rail
- GND -> GND rail
- Z -> Arduino ANALOG2
- Y -> Arduino ANALOG1
- X -> Arduino ANALOG0
- 3.3V -> 3.3V rail
- ST -> No connection
LOGGING TO THE SD CARD


The SD card, or Secure Digital card, is a non-volatile solid-state flash memory. Meaning if
we disconnect power, it will retain its data. With an SD card we can expand Arduino's
permanent storage by gigabytes. This is useful for applications that store large amounts of
data such as data loggers. A 4GB SD card can be had for only $5.
POWERING THE SD CARD
The LC STUDIO SD card socket used in this project can be powered with 5V or 3.3V power sources. There is an LM1117 3.3V regulator on board which can handle 800mA of current. The Arduino can provide 3.3V directly but it's limited to 50mA. That's not enough to power the SD card. So I powered the SD card socket from the Arduino Uno's 5V pin which can handle over 500mA of current. The 5V pin on the SD card socket will pass through the LM1117 regulator and come out a 3.3V with a current ceiling of 800mAh.
Just because this SD card socket can be powered with 5V or 3.3V, we still can't connect 5V Arduino pins to the SD card socket's pins. We have to level-shift the Arduino's 5V signals to 3.3V before we can connect them to the SD card.
This is where the SN74AHC125 IC comes in handy. This IC can convert (level-shift) a total of 4 signals from 5V to 3.3V. This is perfect because for this project, I only need to convert 4 Arduino pins from 5V to 3.3V: three to the SD card socket and one to the LGS20031 GPS receiver which is also a 3.3V module.
SD CARD I/O STATUS LED
Since the SD card socket has no LED indicators, I have added a status LED wired to Arduino PIN8, via a 1K Ohms resistor in series. This LED stays on so long as the SD card is working properly. I wrote the Arduino code so that when a write or read of the SD card fails, the LED is turned off. This way we can just look at the prototype and tell if something is wrong, along with other Arduino and GPS receiver LED indicators.
I thought it would be educational to build a prototype that I can take on the road to log,
geo-tag, and time-stamp sensor data to be analyzed later with mapping and/or data analysis
applications. So I figured why not start with a gadget that can log road conditions. This
prototype, the Bump-O-Meter, measures road conditions by using an Arduino, a GPS receiver,
an SD card, and an accelerometer sensor.
This prototype is a generic sensor logging/geo-tagging gadget which means the accelerometer can be replaced with any other sensor(s) to log and map anything anywhere. As a matter of fact, my next adventure with this logger is to replace the accelerometer with a pollution sensor to visualize levels of air quality around town.
This prototype is a generic sensor logging/geo-tagging gadget which means the accelerometer can be replaced with any other sensor(s) to log and map anything anywhere. As a matter of fact, my next adventure with this logger is to replace the accelerometer with a pollution sensor to visualize levels of air quality around town.
Project Sections
This guide is divided into the following sections:
- Overview & Background
- Hardware & Software Components
- Wiring the Prototype
- Logging data to the LC STUDIO SD Card
- Geo-Tagging & Time-Stamping With the LS20031 GPS Receiver
- Measuring Road Condition with an ADXL335 Accelerometer
- PROGRAM: The Arduino Program That Pulls It All Together
- PROGRAM: A Plain GPS Logger To Interface With Google Earth
- Scrubbing & Formatting Data with a Spreadsheet
- Plotting and Color-coding Road Condition Data with GPSvisualizer.com
- Formatting GPS Date/time Output For Stamping Data
- Speed vs. Logging Accuracy
Project Overview
The Bump-O-Meter uses an Arduino to capture the X,Y,Z motion data generated by the ADXL335
accelerometer. In this case, we are measuring road "shakiness" as a result of road
condition. Poor road conditions and uneven road surfaces generate lots of sudden
acceleration in the car body up and down (z-axis).
But before this data is saved to the SD card, it's tagged with location information from the LS20031 GPS receiver and also date/time stamped in real-time using the GPS satellites' atomic clock. More on this later.
We want to capture and analyze the z-axis acceleration information visually to determine which road stretches are poorer and need attention. We can repeat this and compare our data over time. The possibilities are endless. Not just for road condition scanning, but for any sort of environmental geo-data logging.
How to Use
We can use this gadget by placing it in a car and driving over a given road stretch to
assess its condition. We can even attach this prototype to a bike or skateboard to identify
irregular and rough stretches of tracks.
We can substitute the ADXL335 accelerometer sensor with any other sensor(s) such as temperature or pollution sensors with simple code modification.
The data on the SD card can then be imported it into a spreadsheet for scrubbing, sub-setting, reformatting, analysis, and visualizing.
We will also make use of a wonderful website GPSvisualizer.com to plot our data over a map using intelligent markers that change shape and color according to magnitude of road shakiness so we can visually detect road conditions in need of further inspection.
LS20031 GPS RECEIVER
I am using the LS20031 GPS receiver in this prototype to tag logged data with both
geographic location and date/time stamp. The LS20031 is a bread and butter GPS receiver.
It's very simple to operate.
Specifications:
GPS Receivers & NMEA Sentences
When the GPS receiver is powered up, it will start transmitting information via it serial (TX) pin in the form of standardized comma-delimited text lines called NMEA sentences. NMEA stands for National Marine Electronics Association. The one I find useful for this project is the RMC ($GPRMC) sentence.
Example RMC sentence:
$GPRMC,053740.000,A,2503.6319,N,12136.0099,E,2.69,79.65,100106,,,A*53
Powering and Wiring the LS20031
The LS20031 is a 3.3V module. We cannot connect the Arduino output pins (5V) to the LS20031 RX pin (3.3V) without level shifting. We use the SN74AHC125 for this. However, the GPS TX pin (3.3V) can be wired directly to the Arduino RX pin (5V) as the Arduino will treat 3.3V as a logical high.
Configuring the LS20031
For this prototype, I used MiniGPS 1.4 to configure the receiver:
Download LS20031 Datasheet (PDF)
Specifications:
- Model: LS20031 / Chip: MediaTek MT3329
- Voltage: 3.3V
- Update rate: 1Hz default, up to 10Hz
- Hot start: < 2 seconds / Cold Start: 35 seconds
- Position Accuracy: Autonomous 3m, SBAS 2.5m
- Velocity: < 515 m/s
GPS Receivers & NMEA Sentences
When the GPS receiver is powered up, it will start transmitting information via it serial (TX) pin in the form of standardized comma-delimited text lines called NMEA sentences. NMEA stands for National Marine Electronics Association. The one I find useful for this project is the RMC ($GPRMC) sentence.
Example RMC sentence:
$GPRMC,053740.000,A,2503.6319,N,12136.0099,E,2.69,79.65,100106,,,A*53
Powering and Wiring the LS20031
The LS20031 is a 3.3V module. We cannot connect the Arduino output pins (5V) to the LS20031 RX pin (3.3V) without level shifting. We use the SN74AHC125 for this. However, the GPS TX pin (3.3V) can be wired directly to the Arduino RX pin (5V) as the Arduino will treat 3.3V as a logical high.
Configuring the LS20031
For this prototype, I used MiniGPS 1.4 to configure the receiver:
- Baud rate: 4800
- Fix Update Rate: 5/sec (5Hz)
- NMEA outputs: RMC output set to 1, all others to 0.
ADXL335 ACCELEROMETER


The ADXL335 is a 3-axis analog acceleration measurement sensor. Basically, this gizmo can
detect speed of movement, also known as g-force, in three directions: up/down (z),
forward/backward (x), and sideways (y).
Download ADXL335 Datasheet
Download ADXL335 Datasheet
FEELING THE ROAD: THE ADXL335 ACCELEROMETER

The ADXL335 is a 3-axis analog acceleration measurement sensor. That's a mouthful.
Basically, this gizmo can detect speed of movement, also known as g-force, in three
directions: up/down (z), forward/backward (x), and sideways (y). The axis directions change
depending on how we position the sensor IC.
The ADXL335 has a measurement range of ±3 g minimum for each axis. When you are standing still, the earth exerts a gravitation force of 1g. This sensor outputs signals in the form of voltage changes ranging from 0 to 3.3V. At zero gravity, the voltage value of the Z pin is right in the middle between 0V and 3.3V = 1.65V.
The accelerometer can measure the static acceleration of gravity (1g) as well as tilt-sensing applications and also dynamic acceleration resulting from motion, shock, or vibration. Which axis of the ADXL335 reports 1g is dependent on how you position the chip.
The ADXL335 Goes Mobile
I drive a Toyota Yaris, a good car as far as reliability and fuel economy but not known for its luxury suspension system. This is perfect for my purposes. A high-end suspension system may dampen road bumpiness possibly generating weaker and inconclusive ADXL335 sensor readings.
Powering the ADXL335
This particular ADXL335 breakout board must be powered by a 3.3V source. It's also configured to provide updates 50 times per second. That's plenty of resolution for our road condition sensing device.
Since the Arduino Uno can handle reading 3.3V signals without conversion, we can wire the ADXL335's X,Y,Z outputs pins (3.3V) to Arduino Uno's analog input pins (5V) directly.
THE ARDUINO PROGRAM THAT PULLS IT ALL TOGETHER
This program reads the LS20031 GPS receiver and saves the NMEA sentences generated by the
receiver as-is to the SD card. The program also reads the X, Y, Z pins of the ADXL335
accelerometer and saves them with each NMEA line saved.
The Arduino program I developed for this prototype uses the SD library. I am not using TinyGPS to interact with the GPS receiver or SoftwareSerial. I did not need TinyGPS for this project since I am saving raw NMEA messages to the SD card. As for the SoftwareSerial library, after I ran into a few issues which were time consuming to resolve I decided to stick to the default Arduino serial library.
The downside of not using SoftwareSerial in this project is that the GPS Receiver will be using the Arduino's RX/TX pins to read configuration commands and to send GPS data to the Arduino. This means we don't have the Arduino Serial Monitor available for debugging.
More importantly, we will have to disconnect the Arduino Uno's PIN0 (RX) from the GPS receiver's TX pin before uploading an Arduino program. If we don't disconnect Arduino's PIN0 (RX) from the GPS receiver, it will most likely fail to upload the Arduino program from the PC to the Arduino because of serial conflict. I found this to be a small price for the gains in coding compactness and shortened development cycle.
The data saved by this program to the SD will look like the list below. Theoretically, five lines of GPS and sensor data will be generated per second. This log can be imported as a comma-delimited file into a host of applications such as spreadsheets or databases for scrubbing, analysis, and charting:
- 446,425,542,GPRMC,093116.200,A,3158.0155,N,03551.5032,E,18.78,291.56,111112,,,A*54
- 443,442,542,GPRMC,093116.400,A,3158.0159,N,03551.5020,E,18.78,291.79,111112,,,A*50
- 444,435,523,GPRMC,093116.600,A,3158.0163,N,03551.5009,E,18.77,292.32,111112,,,A*53
- 444,432,525,GPRMC,093116.800,A,3158.0167,N,03551.4998,E,18.75,292.88,111112,,,A*5A
/*
PROJECT: Bump-O-Meter (Geo Data Logger for Sensors)
DEVELOPER:  Hazim Bitar (techbitar at gmail dot com)
DESCRIPTION:  This program reads the ADXL335 accelerometer sensor data (X,Y,Z)  or any
sensor data then saves this data to an SD card along with geo-location and a date/time stamp
generated by the LS20031 GPS receiver.
LICENSE:      I am placing this code in the public domain
DATE:         NOV 16, 2012
*/

#include <SD.h>
#define LED 8           // status LED for SD operations
#define BUFF_MAX 100    // size of GPS & SD buffers

File GPSlog;

void setup()
{
  Serial.begin(4800); // The LS20031 GPS receiver must be set to 4800 for program to work

  // You can use the statements below to send configuration commands to the LS20031 GPS.
  // But for this to work, the baud rate must be set on the LS20031 GPS receiver to 4800.
  // You can use the MiniGPS 1.4 utility to configure or query the LS20031 GPS receiver.
  //
  // LS20031 COMMANDS:
  // Serial.print("$PMTK251,4800*27\r\n");  // Set GPS baud rate
  // Serial.print("$PMTK314,0,1,0,0,0,0,0,0,0,0,0,0,0,0,0,0,0*2C\r\n"); // Set RMC to 5 fixes/second.
  // Serial.print("$PMTK220,200*2C\r\n");  // GPS update rate at 5Hz

  pinMode(10, OUTPUT);   // Per SD library notes, pin 10 must be set to output
  pinMode(LED, OUTPUT);

  if (!SD.begin(4)) {        // SD card detected?
    digitalWrite(LED, LOW);   // turn off status LED if SD detection fails
    return;
  }
  else   digitalWrite(LED, HIGH); // turn on LED if SD detection is OK

  GPSlog = SD.open("GPS.log", O_CREAT | O_WRITE);  // open/append to a file GPS.log
  if (!GPSlog) {               // test if file can be opened
    digitalWrite(LED,LOW);     // turn off status LED if file open fails
    return;
  }
  else digitalWrite(LED, HIGH);  // turn on status LED if file open is OK
}

void loop()
{
  char inBuffer[BUFF_MAX];    // buffer used to read NMEA lines from GPS
  byte outBuffer[BUFF_MAX];   // buffer used to write NMEA lines to SD card
  int sizeBuffer = 0;        // counter of how many chars per line

// HERE WE DECLARE MORE OR LESS ANALOG SENSOR VARIABLES
  char an0[4], an1[4], an2[4];  // char variables to store analog pin values. Total 6 pins from 0-5

  while (Serial.available()>0)  // if serial data available from GPS
  {
    sizeBuffer = Serial.readBytesUntil('\n', inBuffer, BUFF_MAX);  // read one NMEA line from GPS until end of line

//  THIS IS WHERE WE READ SENSOR VALUES
    itoa (analogRead(A0),  an0, 10);    // X read and convert numeric analog pin to char
    itoa (analogRead(A1),  an1, 10);    // Y  ..
    itoa (analogRead(A2),  an2, 10);    // Z  ..
    for (int i = 0; i < BUFF_MAX; i++) outBuffer[i] = inBuffer[i];   // create CSV file on SD
    int j = 0;

    // THIS IS WHERE WE WRITE SENSOR DATA TO THE SD FILE
    if (GPSlog) {
      GPSlog.print(an0);    // write ANALOG0 (X) to SD
      GPSlog.print(" , ");
      GPSlog.print(an1);    // write ANALOG1 (Y) to SD
      GPSlog.print(" , ");
      GPSlog.print(an2);    // write ANALOG2 (Z) to SD
      GPSlog.print(" , ");
      // If you only want NMEA output logged, comment out all above GPSlog.print statements
      GPSlog.write(outBuffer, sizeBuffer);  // write GPS NMEA output to SD
      GPSlog.print("\r\n");
      GPSlog.flush();
      digitalWrite(LED, HIGH);  // Keep LED on so long as SD logging is working.
    }
    else {
      // if the file didn't open, turn LED off
      digitalWrite(LED, LOW);  // turn LED off if writing to file fails
    }
  }
}
// ================ END PROGRAM =====================
HOW TO ADD/REMOVE SENSORS TO THE GEO DATA LOGGER
This program will read up to 6 analog sensors and save their values to the SD card. There are three places in the program where you need to make changes to suit your needs:
1. DECLARING SENSOR VARIABLES
In the declaration section, we create text variables that will hold the converted numeric values of the sensors before we write them to the SD card. Here, we are declaring for a maximum of 6 analog sensors. Reduce as needed.
2. READING SENSORS
In this part of the program, we convert the numeric sensor readings to text before we write them to the SD card. Change the next code segment in the program to add/remove sensors as needed. You can have up to 6 analog sensors read in this program:
3. WRITING SENSORS VALUES TO THE SD CARD
After we read the sensor(s) above, we write their text values to the SD card. In the code segment below, we are adding a comma between each sensor value written to the SD card so we can separate them. This makes it easier to import them into a spreadsheet program as comma-delimited text:
This program will read up to 6 analog sensors and save their values to the SD card. There are three places in the program where you need to make changes to suit your needs:
1. DECLARING SENSOR VARIABLES
In the declaration section, we create text variables that will hold the converted numeric values of the sensors before we write them to the SD card. Here, we are declaring for a maximum of 6 analog sensors. Reduce as needed.
char an0[4], an1[4], an2[4], an3[4], an4[4], an5[4];2. READING SENSORS
In this part of the program, we convert the numeric sensor readings to text before we write them to the SD card. Change the next code segment in the program to add/remove sensors as needed. You can have up to 6 analog sensors read in this program:
itoa (analogRead(A0),  an0, 10);
itoa (analogRead(A1),  an1, 10);
itoa (analogRead(A2),  an2, 10);
itoa (analogRead(A3),  an3, 10);
itoa (analogRead(A4),  an4, 10);
itoa (analogRead(A5),  an5, 10);
3. WRITING SENSORS VALUES TO THE SD CARD
After we read the sensor(s) above, we write their text values to the SD card. In the code segment below, we are adding a comma between each sensor value written to the SD card so we can separate them. This makes it easier to import them into a spreadsheet program as comma-delimited text:
GPSlog.print(an0);    // write ANALOG0 to SD card
GPSlog.print(" , ");
GPSlog.print(an1);    // write ANALOG1 to SD card
GPSlog.print(" , ");
GPSlog.print(an2);    // write ANALOG2 to SD card
GPSlog.print(" , ");
GPSlog.print(an3);    // write ANALOG3 to SD card
GPSlog.print(" , ");
GPSlog.print(an4);    // write ANALOG4 to SD card
GPSlog.print(" , ");
GPSlog.print(an5);    // write ANALOG5 to SD card
GPSlog.print(" , ");
A PLAIN GPS LOGGER TO INTERFACE WITH GOOGLE EARTH
For those who want to use this prototype as a generic GPS logger, to track your path, just
upload the Arduino code below. This program will generate raw NMEA RMC sentences to file
GPS.LOG on the SD card without any sensor data.
We can then Import the GPS.LOG file into Google Earth and generate maps overlaid with your logged track points. Please refer to my LS20031 GPS tutorial on how to import a raw GPS NMEA log files into Google Earth.
You can also import this NMEA log file into Excel as a comma-delimited text file and reformat it for GPSvisualizer.com to draw maps with track points and more. More on this in the next sections.
/*
PROJECT: A Plain GPS Logger
DEVELOPER:  Hazim Bitar (techbitar at gmail dot com)
DESCRIPTION:  This program logs GPS location information wherever you go and saves to the SD card as raw NMEA data to be imported into Google Earth.
LICENSE:      I am placing this code in the public domain
DATE:         NOV 17, 2012
*/
#include <SD.h>
#define LED 8           // status LED for SD operations
#define BUFF_MAX 100    // size of GPS & SD buffers

File GPSlog;

void setup()
{
  Serial.begin(4800); // The LS20031 GPS receiver must be set to 4800 for program to work
  pinMode(10, OUTPUT);   // Per SD library notes, pin 10 must be set to output
  pinMode(LED, OUTPUT);

  if (!SD.begin(4)) {        // SD card detected?
    digitalWrite(LED, LOW);   // turn off status LED if SD detection fails
    return;
  }
  else   digitalWrite(LED, HIGH); // turn on LED if SD detection is OK

  GPSlog = SD.open("GPS.log", O_CREAT | O_WRITE);  // open/append to a file GPS.log
  if (!GPSlog) {               // test if file can be opened
    digitalWrite(LED, LOW);     // turn off status LED if file open fails
    return;
  }
  else digitalWrite(LED, HIGH);  // turn on status LED if file open is OK
}

void loop()
{
  char inBuffer[BUFF_MAX];    // buffer used to read NMEA lines from GPS
  byte outBuffer[BUFF_MAX];   // buffer used to write NMEA lines to SD card
  int sizeBuffer = 0;        // counter of how many chars per line

  while (Serial.available()>0)  // if serial data available from GPS
  {
    sizeBuffer = Serial.readBytesUntil('\n', inBuffer, BUFF_MAX);  // read one NMEA line from GPS until end of line
    for (int i = 0; i < BUFF_MAX; i++) outBuffer[i] = inBuffer[i];   // create CSV file on SD
    int j = 0;
    if (GPSlog) {
      GPSlog.write(outBuffer, sizeBuffer);  // write GPS NMEA output to SD
      GPSlog.print("\r\n");
      GPSlog.flush();
      digitalWrite(LED, HIGH);  // Keep LED on so long as SD logging is working.
    }
    else {
      // if the file didn't open, turn LED off
      digitalWrite(LED, LOW);  // turn LED off if writing to file fails
    }
  }
}
SCRUBBING & FORMATTING DATA WITH A SPREADSHEET


With enough road data captured on the SD card, we now start the data scrubbing and
re-formatting in preparation for analysis and visualization in Excel, GPSvisualizer, or our
favorite data analysis and charting tool.
Remove the SD card from the socket and insert into PC SD card reader. Copy the GPS.log file to your PC and Run Excel (or your favorite spreadsheet application). The steps below are for Excel 2007:
Remove the SD card from the socket and insert into PC SD card reader. Copy the GPS.log file to your PC and Run Excel (or your favorite spreadsheet application). The steps below are for Excel 2007:
- From Excel, File/Open and select GPS.log. Make sure you select File Type All Files (*.*) else you will not see the file GPS.log listed. Open file. This will launch the Text Import Wizard.
- Select Delimited radio button. Click Next.
- Select Comma check box only. Click Next.
- Excel will import the GPS.log file into columns and rows. The columns are ordered in this manner: X, Y, Z, NMEA output type, UTC Time, Status A: A=data valid or V=data not valid, Latitude, N/S Indicator: N=north or S=south, Longitude, E/W Indicator: E=east or W=west, Speed over ground, Course over ground, Date, Magnetic variation, Variation sense: E=east or W=west, Mode A: A=autonomous, D=DGPS, E=DR, Checksum.
- In column 'F' you will see one letter either A or V. A means valid fix. V means invalid data. So delete all rows that are invalid.
- Also, delete jumbled lines.
- Keep columns C (z-axis), G (Latitude), and I (Longitude) but hide other imported columns.
- Add header labels to the top of the remaining three columns: N, Latitude, Longitude.
- Now select and copy to clipboard the range of rows you wish to map in GPSvisualizer and don't forget to also copy the column header labels.
PLOTTING AND COLOR-CODING ROAD CONDITION DATA WITH GPSVISUALIZER.COM


First, let's open GPSvisualizer and open the "Plot data points" page: http://www.gpsvisualizer.com/map_input?form=data
STEP 1: Find the scroll box titled "Or paste your data here" and delete everything in it then paste the data you have copied from Excel into it. You should get a clean three column content with the headers N Latitude Longitude. Make sure you don't change the headers in any way after you paste them and don't add commas or tabs in between. Just a straight paste from Excel.
STEP 2: You can skip this step for now or you can make changes to "Data point options" to follow my settings as shown in the figure.
STEP 3: Click "Draw the map" button and watch the magic.
HOW TO READ THE MAP
A Google Map will be displayed and overlaid with the route points captured by our geo data logger. In my case, I have selected stars as the icons for the data points. The larger and more blueish the data point or the smaller the more reddish the bigger the road bump or pothole.
By clicking on a star, a balloon will pop up with the z-axis value read by the ADXL335 accelerometer. Long road stretches of comparable greenish colors and values (typically 520 in my case) mean the road is smoother.
TRANSLATING SENSOR DATA INTO ROAD CONDITION INFO
I have simplified this part so almost no math will be needed to assess road conditions using the data generated by the ADXL335 sensor. So there will be no translation from raw accelerometer sensor outputs to g values. The whole trick rests in road condition profiling and sensor data comparison.
PROFILING ROAD DATA
Different geo data loggers may produce different readings than mine for various reasons. So we need to profile normal road conditions and abnormal road condition before we can make sense of our data. Profiling road conditions is simple. We record sensor data generated by the ADXL335 sensor while we drive over a good road stretch then do the same with sensor data generated when we drive over a rough road stretch.
In my case, I get an average of 520 for the z-axis on a good road stretch. I can use this as a frame of reference so if I get sample data of 520 plus or minus a few notches then this is a good road. But if I drive over a bump or pothole, I get sensor z-axis readings that hover around 500 on the low end and 535 on the high end. This will be my profile of a rough road.
The basic assumption here is that I am using the same car, with the sensor placed in the same spot in the car, and driving at the same speed every time I profile the road with my geo data logger.
In the "Data point options" by assigning the "Min" color field my my lower z-axis number and "Max" field my high z-axis number, now I can use GPSvisualizer.com to determine visually, by color or size of marker, where to find poor road stretches, potholes, and bumps.
ANALYZING SENSOR DATA AND ROAD CONDITIONS
When it comes to analyzing the sensor data, sometimes bumps may look like potholes and vice versa. It's possible to log what seems like a pothole condition when in reality we are just dropping back to normal street level right after a road bump. It's also possible to get a sensor reading that resembles that of a bump when the car starts climbing out of the pothole.
We look for small or large z-axis readings, based on the min/max values withing the range of captured data, to identify abnormal road conditions. But classifying these road conditions might require more analysis. We can always play around with GPSvisualizer settings until we get the visual representation we need.
The important thing is to record presence of a road condition in need of attention or to avoid it next time you are on the same road.
FORMATTING GPS DATE/TIME OUTPUT FOR STAMPING DATA
Since time-stamping logged data is important for many projects, I will explain how to
extract and format the GPS generated time/date data.
The LS20031 GPS receiver, as with other GPS receivers of its class, updates its internal clock to sync with the GPS satellites' internal atomic clock which is accurate to 1 billionth of a second. The GPS receiver sends date/time stamped location fixes via a variety of NMEA text sentences. We have chosen the RMC NMEA message for this project. This is how an RMC sentence looks like:
$GPRMC,093025.600,A,3157.8299,N,03551.5057,E,18.18,37.45,111112,,,A*6C
The first boldfaced number is the UTC Time (hhmmss.sss). So 093025.600 is 09:30:25. The second is the date (ddmmyy). So 111112 is 11-November-2012.
SPEED VS LOGGING ACCURACY


NOTE: I have oversimplified the concepts in this section to keep this guide short and
accessible. The accuracy and resolution of the geo data logger will depend on many factors
such as moving speed, sensor update frequency, and GPS fix rate.
As for our Bump-O-Meter, the bottleneck is the GPS receiver, at 5 updates per second (5Hz). If driving at 60 Km/h, the GPS provides a fix every 16.6 meters. Since the GPS provides 5 fixes per second, that's a fix every 3.3 meters. Keep in mind this GPS receiver is accurate within 2.5 meters.
MATH FOR FUN (No such thing)
So the bottleneck for our Bump-O-Meter will be the GPS receiver, at 5 updates per second (5Hz). Let's assume we are driving at 60 Km/h and the GPS is reporting 5 location fixes per second.
At 30 kilometers per hour, we can double the accuracy of our logger and so on. At 15...and so forth. The key thing is to record a road bump or pothole even if we don't have its exact location. Because so long as we capture the bump's existence on our logger, we can find it if we go searching for it within +/- 2.5 meters (GPS accuracy) of the location reported by the logger.
For smoother data such as the ones generated by outdoors temperature and humidity sensors, we can make use of fairly simple techniques for guessing in-between data, such as interpolation.
INTERPOLATION OF MISSING DATA
Interpolation is a method of guessing a mid data point within two recorded sensor data points. For example, if we log 32 degrees F at 0 meters and 33 degrees F at 100 meters, we can guess that at 50 meters the temperature is 32.5 degrees F. However, potholes and road bumps don't lend themselves to interpolation because they tend to be sudden. For detecting potholes, we have to drive slower to give our geo data logger time to catch those (<15 Km/h).
As for our Bump-O-Meter, the bottleneck is the GPS receiver, at 5 updates per second (5Hz). If driving at 60 Km/h, the GPS provides a fix every 16.6 meters. Since the GPS provides 5 fixes per second, that's a fix every 3.3 meters. Keep in mind this GPS receiver is accurate within 2.5 meters.
MATH FOR FUN (No such thing)
So the bottleneck for our Bump-O-Meter will be the GPS receiver, at 5 updates per second (5Hz). Let's assume we are driving at 60 Km/h and the GPS is reporting 5 location fixes per second.
- 60 kilometers per hour = 1 Km per minute.
- 1 kilometer per minute = 16.6 meters per second.
- Since the LS20031 GPS receiver provides 5 fixes per second that's a fix every 3.3 meters. Keep in mind this GPS receiver is accurate within 2.5 meters.
At 30 kilometers per hour, we can double the accuracy of our logger and so on. At 15...and so forth. The key thing is to record a road bump or pothole even if we don't have its exact location. Because so long as we capture the bump's existence on our logger, we can find it if we go searching for it within +/- 2.5 meters (GPS accuracy) of the location reported by the logger.
For smoother data such as the ones generated by outdoors temperature and humidity sensors, we can make use of fairly simple techniques for guessing in-between data, such as interpolation.
INTERPOLATION OF MISSING DATA
Interpolation is a method of guessing a mid data point within two recorded sensor data points. For example, if we log 32 degrees F at 0 meters and 33 degrees F at 100 meters, we can guess that at 50 meters the temperature is 32.5 degrees F. However, potholes and road bumps don't lend themselves to interpolation because they tend to be sudden. For detecting potholes, we have to drive slower to give our geo data logger time to catch those (<15 Km/h).
DISCLAIMER
This is a prototype and prototypes by definition are drafts of products not finished yet. Your feedback is appreciated.
CONTACT
Hazim Bitar (techbitar)
techbitar at gmail dot com
This is a prototype and prototypes by definition are drafts of products not finished yet. Your feedback is appreciated.
CONTACT
Hazim Bitar (techbitar)
techbitar at gmail dot com